COLORFUL

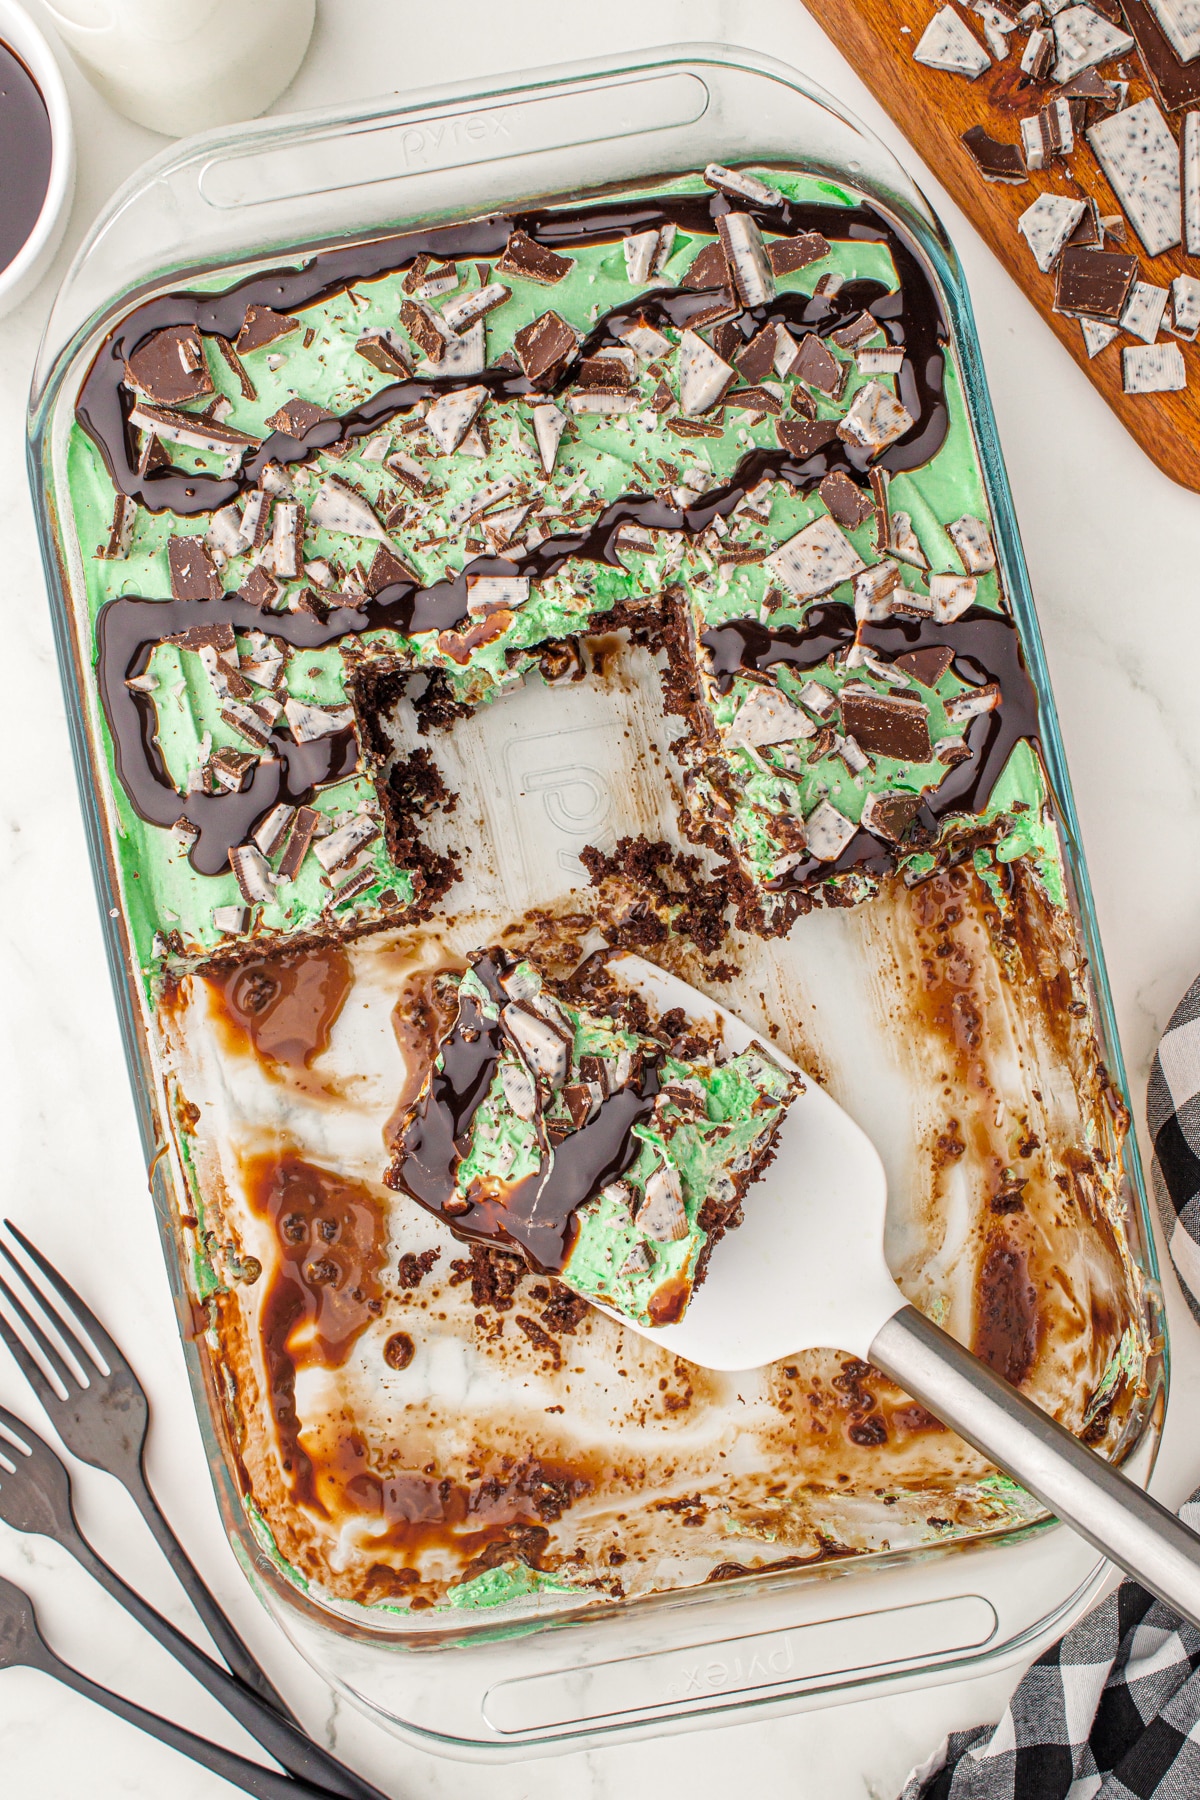
I’m thrilled to share with you a recipe that’s sure to brighten your day and sweeten your gatherings: the Mint Chocolate Poke Cake. This cake isn’t just a treat for the taste buds; it’s a feast for the eyes, too. Imagine the rich, moist layers of devil’s food cake, intermingled with creamy, minty goodness, and topped with the irresistible crunch of Andes chocolate mint candies. A recipe that promises a delightful experience for both the baker and those lucky enough to enjoy a slice!
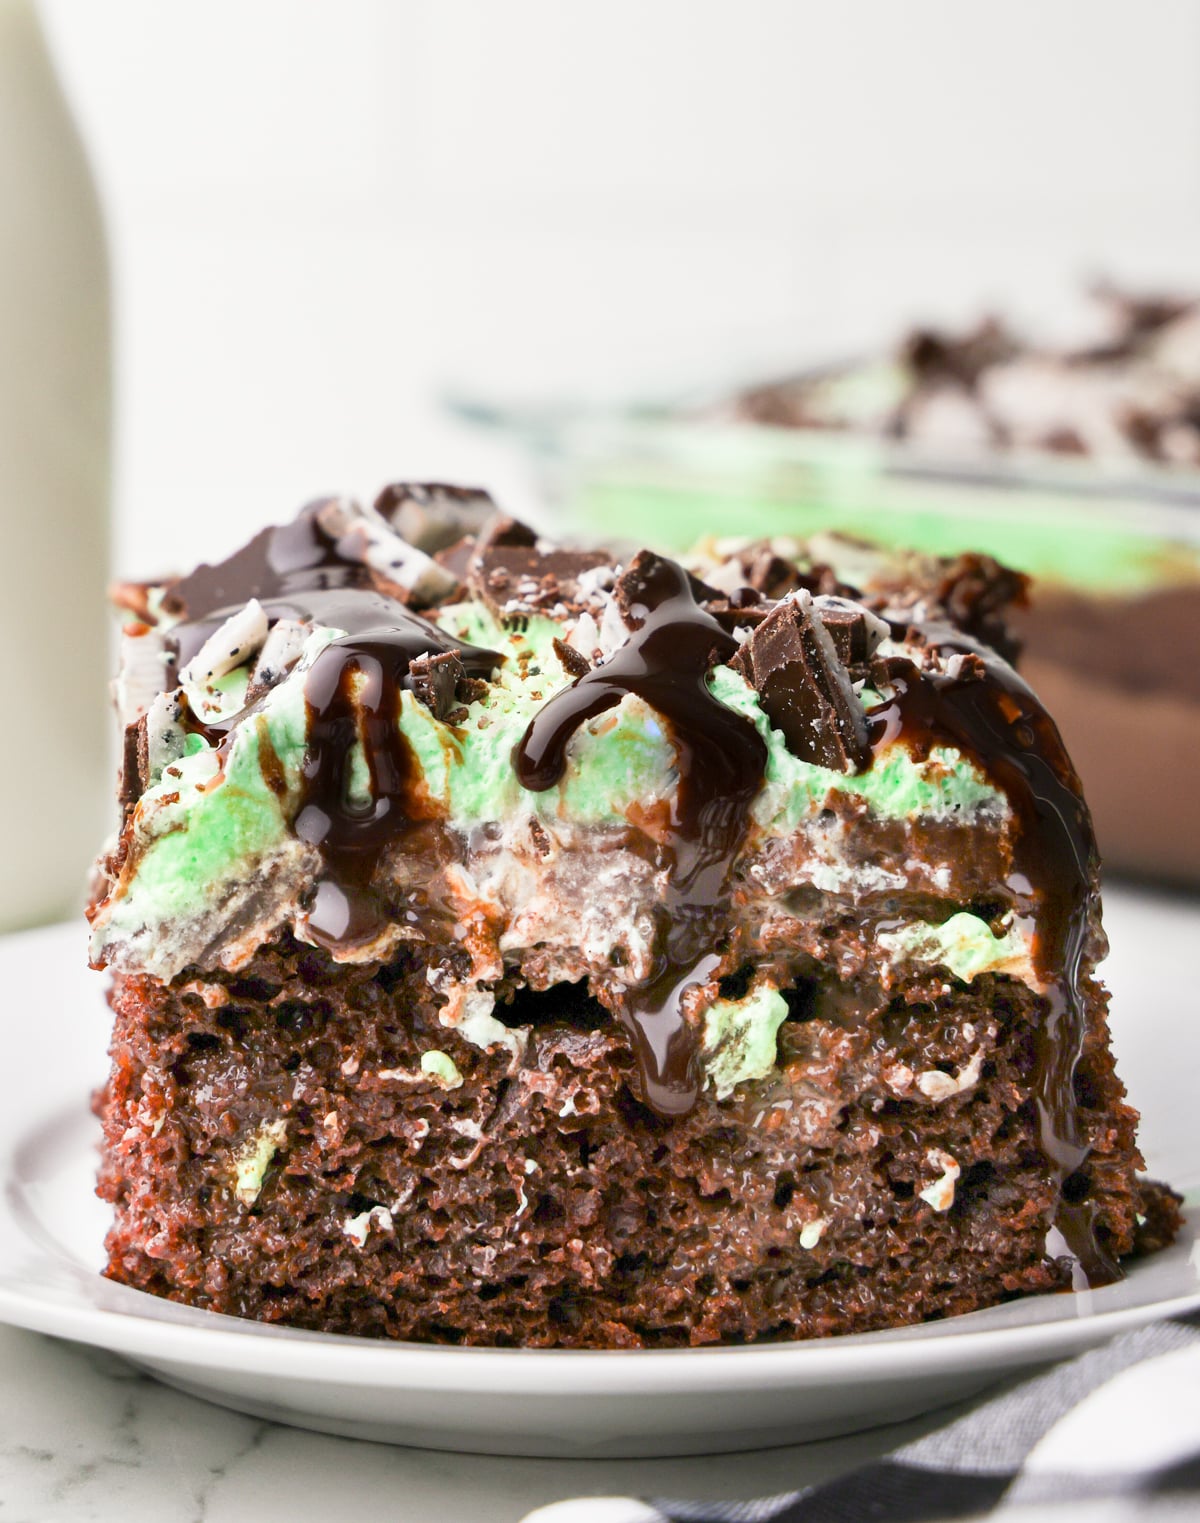
Table of Contents


Mint Chocolate Poke Cake Ingredients
- Devil’s Food Cake Mix
- Water
- Eggs
- Vegetable Oil
- Sweetened Condensed Milk
- Semi Sweet Chocolate
- Whole Milk
- Instant Chocolate Pudding Mix
- Cool Whip
- Green Gel Food Coloring
- Pure Mint Extract
- Andes Chocolate Mint Candies (traditional or cookies & cream)
- Chocolate Syrup
*Scroll to Printable Recipe Card below for detailed amounts!

How to Make Mint Chocolate Poke Cake
- Prep Time: 25 minutes
- Cook Time: 30 minutes
- Chill Time & Rest Time: 1 hour 30 minutes
- Total Time: 2 hours 25 minutes
- Servings: 12
- Preheat Oven and Prepare Cake Mix: Preheat your oven to the temperature specified on the cake mix box (most likely 350° F). In a large bowl, combine the cake mix, 1 cup of water, 3 large eggs, and ½ cup of vegetable oil. Mix until smooth and combined.
- Bake the Cake: Pour the batter into a greased 9×13 inch baking dish. Bake according to the package instructions, usually for around 25-30 minutes. Test the cake’s readiness by inserting a toothpick into the center; it should come out clean when the cake is done. Remove the cake from the oven and let it cool slightly.
- Poke and Soak the Cake: Once the cake is slightly cooled, use the end of a wooden spoon to poke holes all over the cake. Melt the semi sweet chocolate chips in a microwave safe bowl, once melted add the sweetened condensed milk to the melted chocolate and stir together until fully combined. Pour the chocolate sweetened condensed milk all over the cake, aiming to fill the holes. Set aside.
- Prepare Chocolate Pudding Layer: In a medium bowl, whisk together the cold whole milk and the instant chocolate pudding mix until smooth and thick. Pour this mixture everly over the cake, spreading over the top to create a second layer.
- Add Mint Layer: In another bowl, combine the thawed Cool Whip with the green food coloring and mint extract. Adjust the color and flavor to your preference. Spread this minty Cool Whip layer evenly over the chocolate layer on the cake.
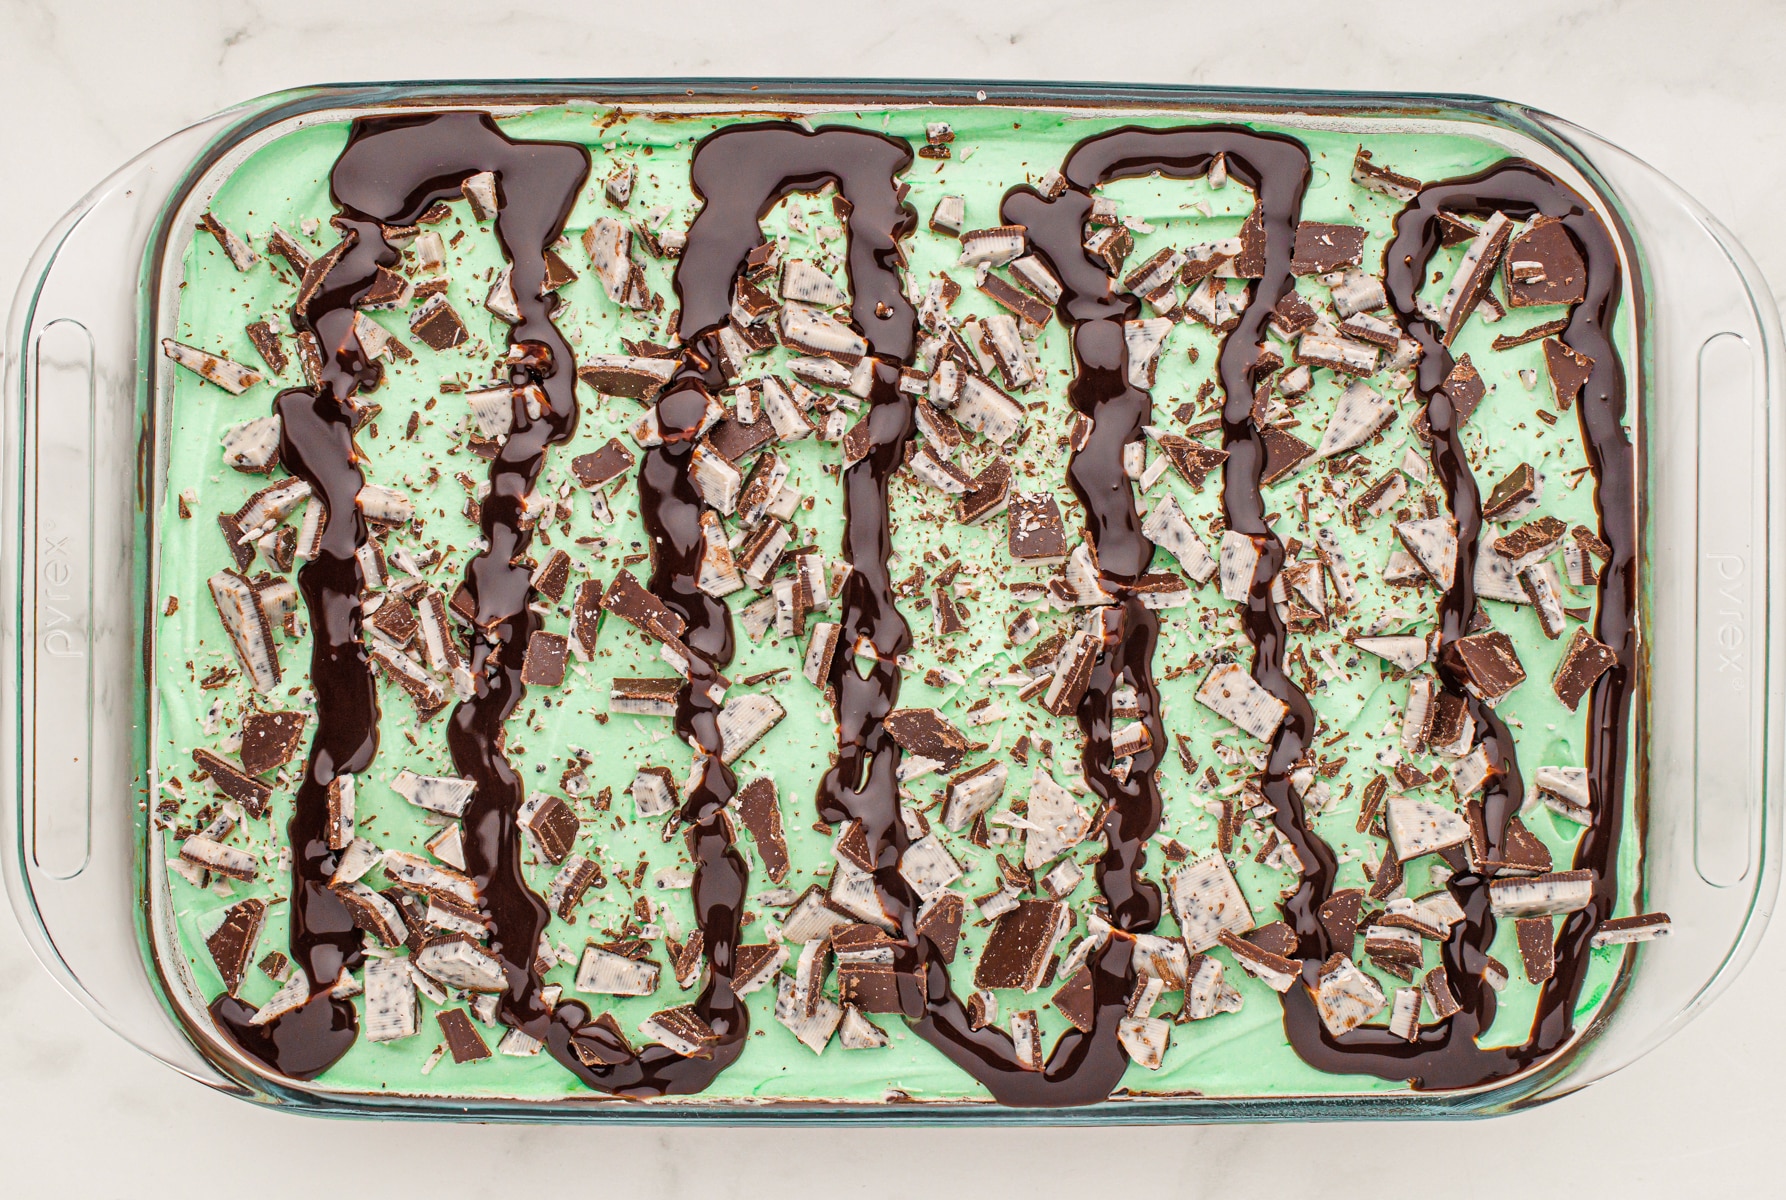
- Garnish and Chill: Sprinkle the chopped Andes Chocolate Mint Candies over the top of the cake. Drizzle chocolate syrup over the cake for an extra chocolatey touch. Refrigerate the cake for at least an hour to allow it to set (can set overnight).
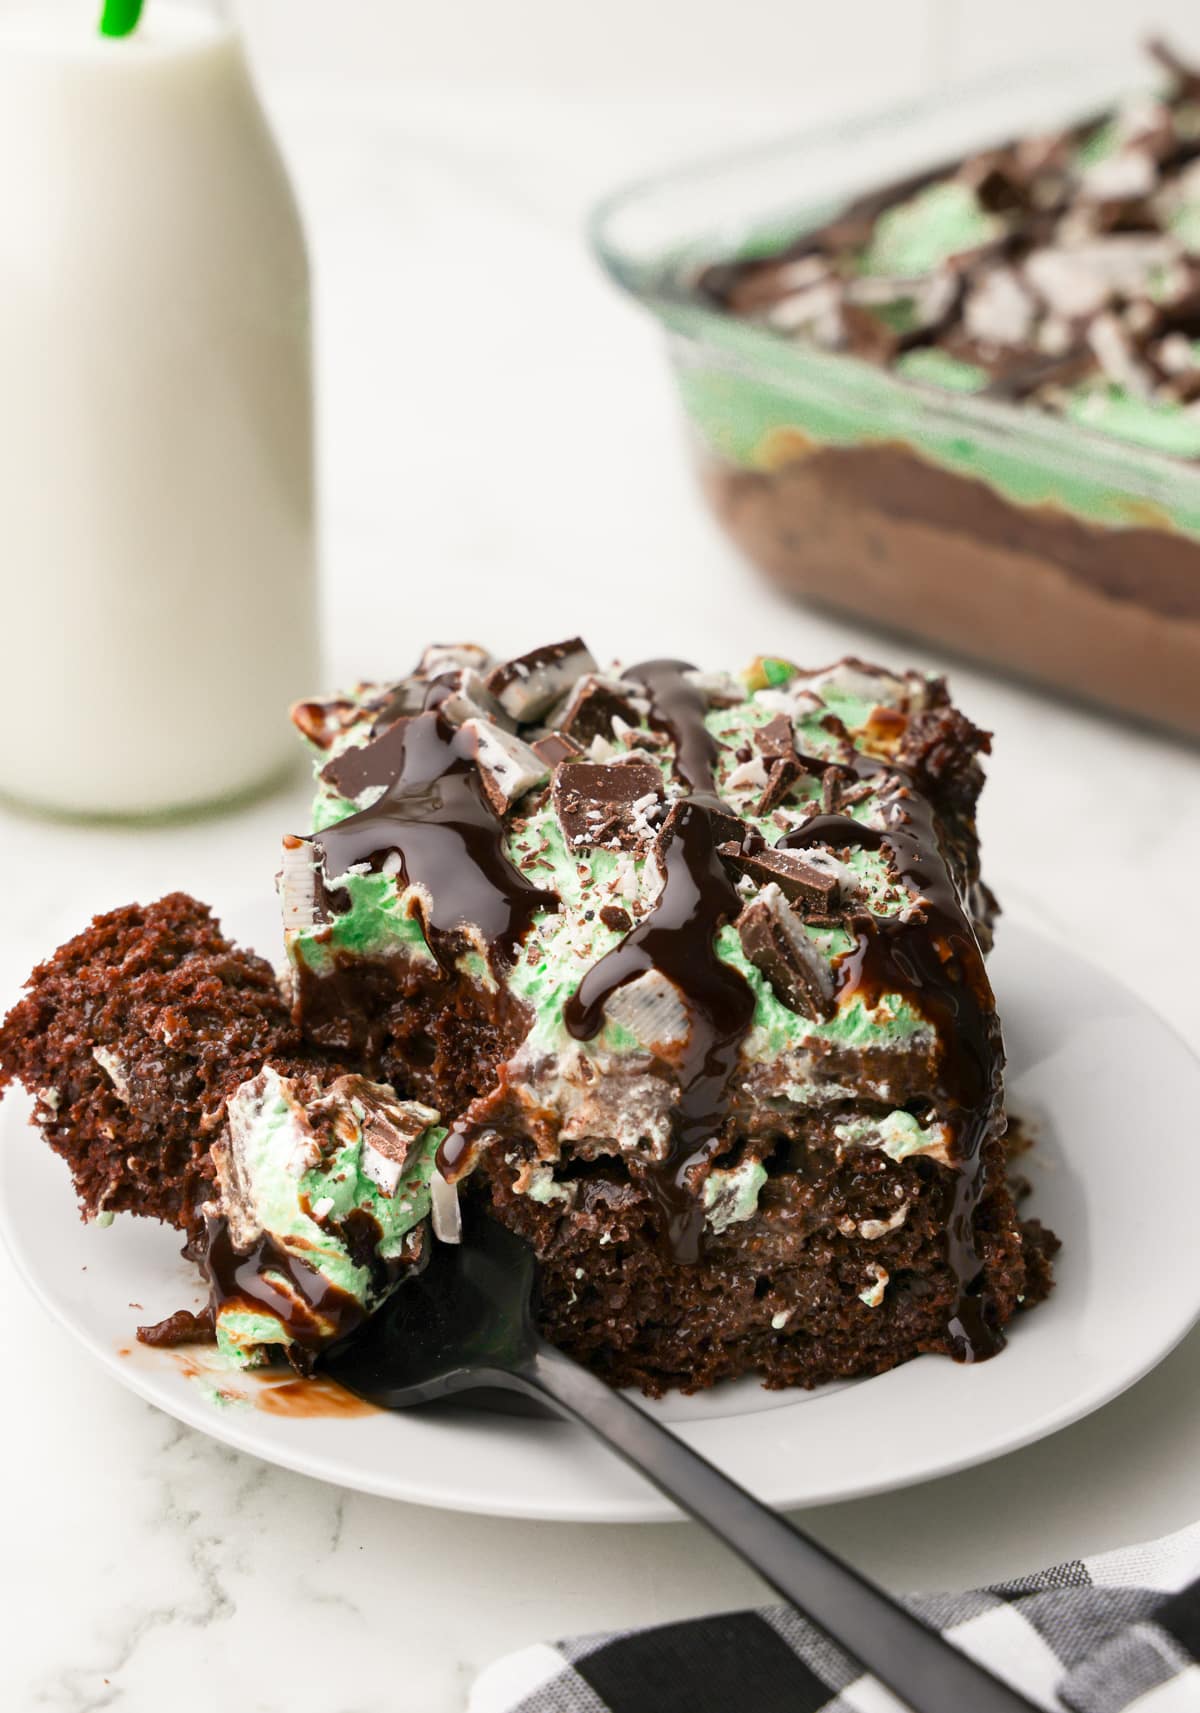
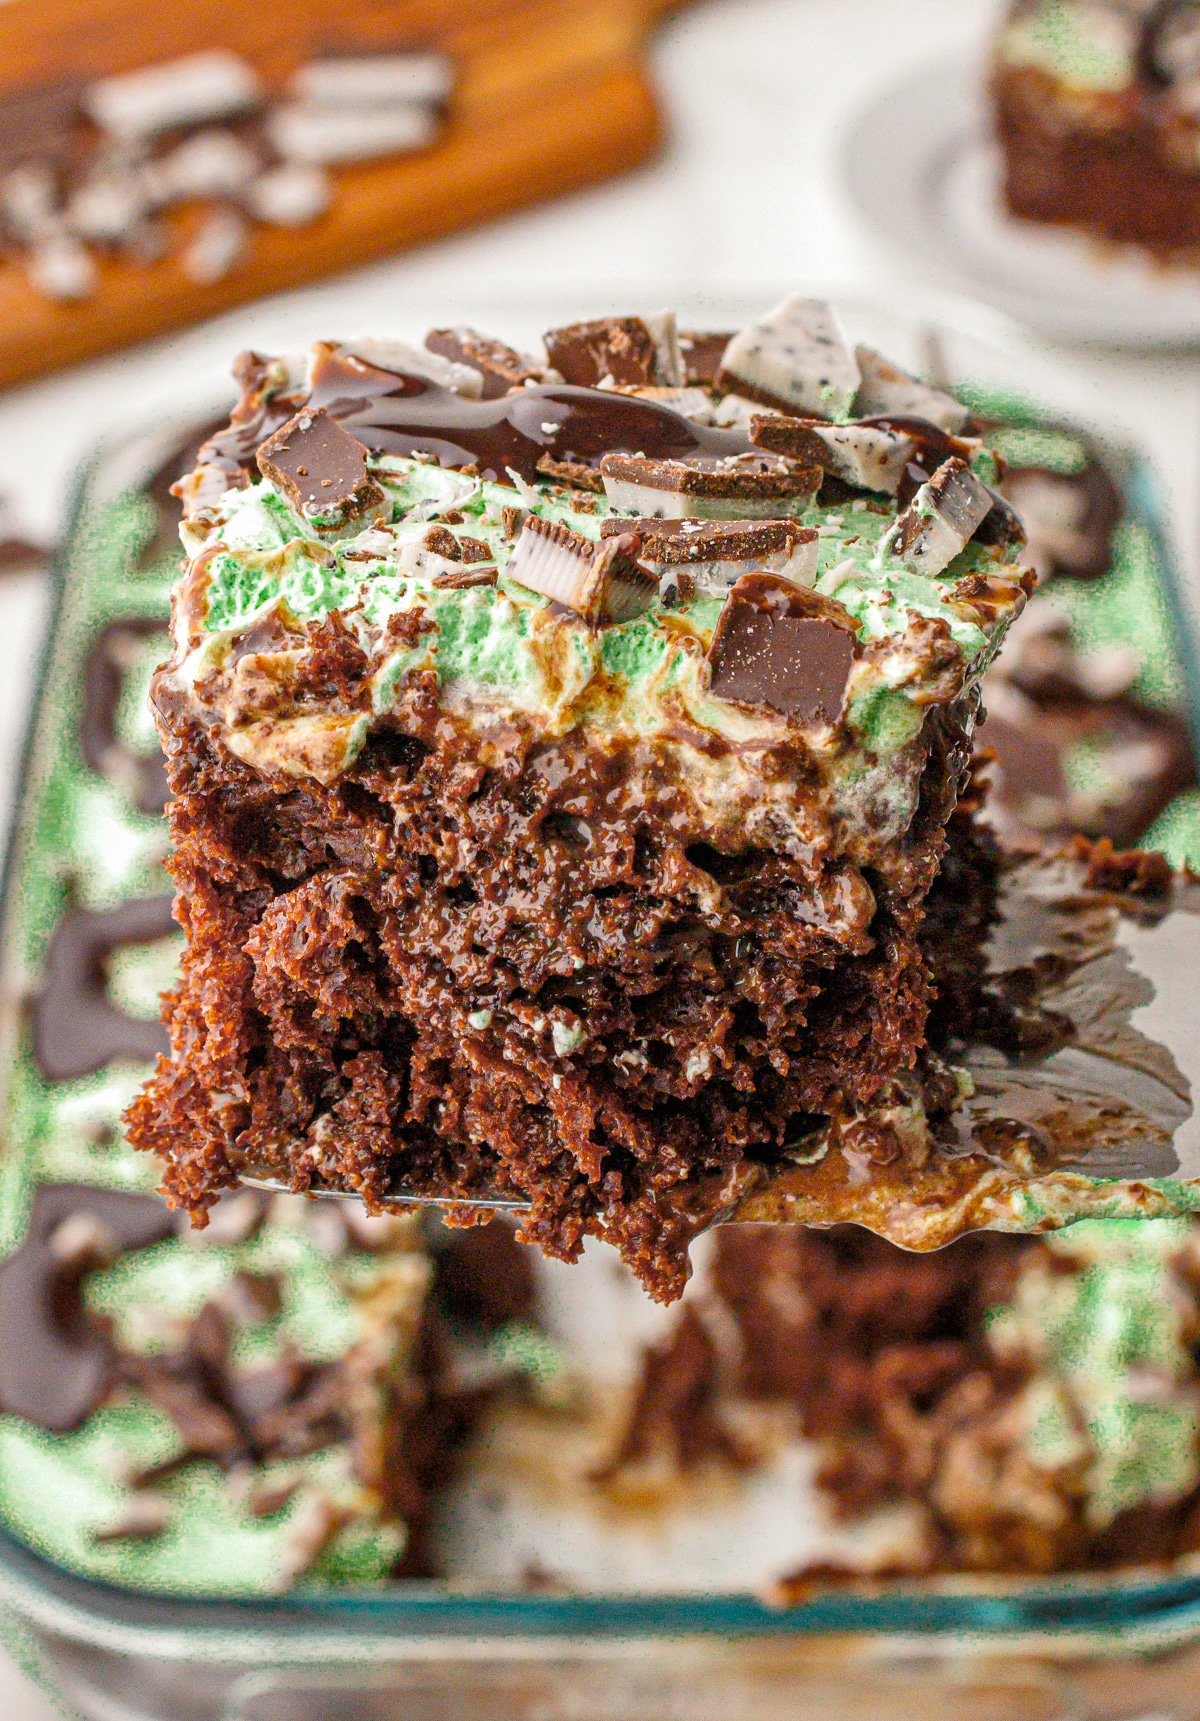
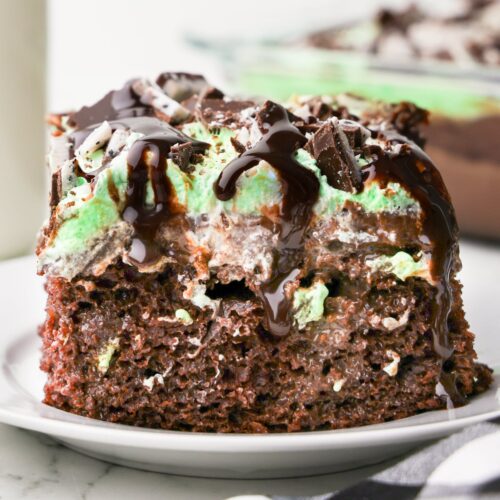
- Serve: Once chilled and set, slice the cake and serve. Enjoy the delicious combination of chocolate and mint in every bite!
Storage and Reheating Instructions
How to Store Mint Chocolate Poke Cake:
The cake can be stored in an airtight container in the refrigerator for up to 5 days.
Helpful Tips & Substitutions
Can This Be Frozen?
- Freezing Method: Wrap individual slices or the whole cake in cling film and then foil. Freeze for up to 3 months.
- Thawing: Thaw overnight in the refrigerator or for a few hours at room temperature.
- Texture Maintenance: Freezing preserves the texture and flavor, making it a convenient make-ahead dessert.

Can This Be Made Ahead of Time?
- Preparation: Bake the cake and add the poke ingredients a day in advance.
- Last-Minute Assembly: Add the Cool Whip and toppings before serving to maintain freshness and texture.
Substitutions & Variations
- Gluten-Free: Use gluten-free cake mix and ensure all other ingredients are gluten-free.
- Dairy-Free Variants: Opt for dairy-free condensed milk and whipped topping.
- Flavor Twist: Experiment with different extracts, like vanilla or almond, for a twist on the traditional mint flavor.
- Toppings: Feel free to add nuts or other types of chocolate for added texture and flavor.
Helpful Cooking Notes
- Cake Test: Use a toothpick to check if the cake is baked through.
- Poke Technique: Ensure the holes are evenly spaced for optimal filling distribution.
- Layering: Allow each layer to set slightly before adding the next to prevent mixing.
- Coloring: Add food coloring gradually to reach the desired shade of green.
Try Some of our Other Favorite Dessert Recipes
Indulge in the perfect blend of rich chocolate and refreshing mint with our easy-to-follow Mint Chocolate Poke Cake recipe.
INGREDIENTS
- 15.25 ounces of Devil’s Food Cake Mix, 1 box I used Duncan Hines
- 1 cup Water
- 3 large Eggs
- ½ cup Vegetable Oil
- 14 ounce can Sweetened Condensed Milk
- ½ cup Semi Sweet Chocolate
- 1¾ cups Whole Milk, cold
- 3.9 ounces Instant Chocolate Pudding Mix, 1 box
- 8 ounces Cool Whip, thawed
- 1-2 drops Green Gel Food Coloring
- ½ teaspoon Pure Mint Extract, not peppermint
- 1 cup Andes Chocolate Mint Candies, traditional or cookies & cream
- Chocolate syrup, for drizzle
INSTRUCTIONS
- Preheat Oven and Prepare Cake Mix: Preheat your oven to the temperature specified on the cake mix box (most likely 350° F). In a large bowl, combine the cake mix, 1 cup of water, 3 large eggs, and ½ cup of vegetable oil. Mix until smooth and combined.
- Bake the Cake: Pour the batter into a greased 9×13 inch baking dish. Bake according to the package instructions, usually for around 25-30 minutes. Test the cake's readiness by inserting a toothpick into the center; it should come out clean when the cake is done. Remove the cake from the oven and let it cool slightly.
- Poke and Soak the Cake: Once the cake is slightly cooled, use the end of a wooden spoon to poke holes all over the cake. Melt the semi sweet chocolate chips in a microwave safe bowl, once melted add the sweetened condensed milk to the melted hocolate and stir together until fully combined. Pour the chocolate sweetened condensed milk all over the cake, aiming to fill the holes. Set aside.
- Prepare Chocolate Pudding Layer: In a medium bowl, whisk together the cold whole milk and the instant chocolate pudding mix until smooth and thick. Pour this mixture everly over the cake, spreading over the top to create a second layer.
- Add Mint Layer: In another bowl, combine the thawed Cool Whip with the green food coloring and mint extract. Adjust the color and flavor to your preference. Spread this minty Cool Whip layer evenly over the chocolate layer on the cake.
- Garnish and Chill: Sprinkle the chopped Andes Chocolate Mint Candies over the top of the cake. Drizzle chocolate syrup over the cake for an extra chocolatey touch. Refrigerate the cake for at least an hour to allow it to set (can set overnight).
- Serve: Once chilled and set, slice the cake and serve. Enjoy the delicious combination of chocolate and mint in every bite!
NOTES
Storage and Reheating Instructions:
How to Store Mint Chocolate Poke Cake:
The cake can be stored in an airtight container in the refrigerator for up to 5 days.Helpful Tips & Substitutions
Can This Be Frozen?
- Freezing Method: Wrap individual slices or the whole cake in cling film and then foil. Freeze for up to 3 months.
- Thawing: Thaw overnight in the refrigerator or for a few hours at room temperature.
- Texture Maintenance: Freezing preserves the texture and flavor, making it a convenient make-ahead dessert.
Can This Be Made Ahead of Time?
- Preparation: Bake the cake and add the poke ingredients a day in advance.
- Last-Minute Assembly: Add the Cool Whip and toppings before serving to maintain freshness and texture.
Substitutions & Variations
- Gluten-Free: Use gluten-free cake mix and ensure all other ingredients are gluten-free.
- Dairy-Free Variants: Opt for dairy-free condensed milk and whipped topping.
- Flavor Twist: Experiment with different extracts, like vanilla or almond, for a twist on the traditional mint flavor.
- Toppings: Feel free to add nuts or other types of chocolate for added texture and flavor.
Helpful Cooking Notes
- Cake Test: Use a toothpick to check if the cake is baked through.
- Poke Technique: Ensure the holes are evenly spaced for optimal filling distribution.
- Layering: Allow each layer to set slightly before adding the next to prevent mixing.
- Coloring: Add food coloring gradually to reach the desired shade of green.
NUTRITION
Serving: 12gCalories: 548kcalCarbohydrates: 70gProtein: 10gFat: 27gSaturated Fat: 9gPolyunsaturated Fat: 8gMonounsaturated Fat: 8gTrans Fat: 0.1gCholesterol: 49mgSodium: 746mgPotassium: 355mgFiber: 3gSugar: 45gVitamin A: 241IUCalcium: 261mgIron: 4mg
Tried this recipe?Mention @sweettea_and_sprinkles or tag #sweetteaandsprinkles