COLORFUL
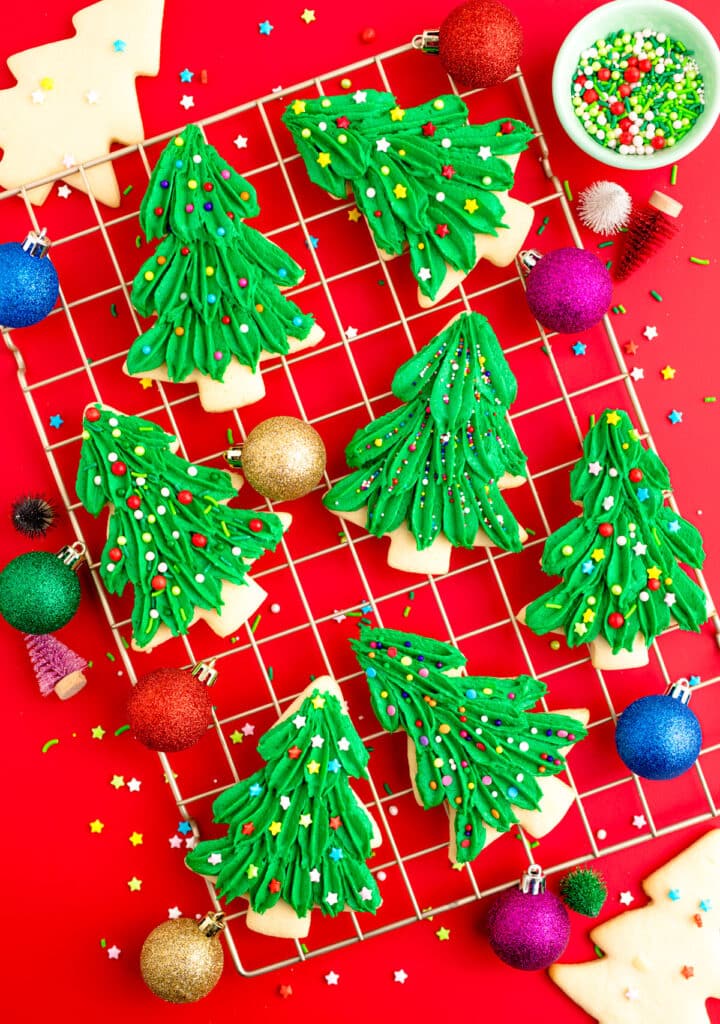
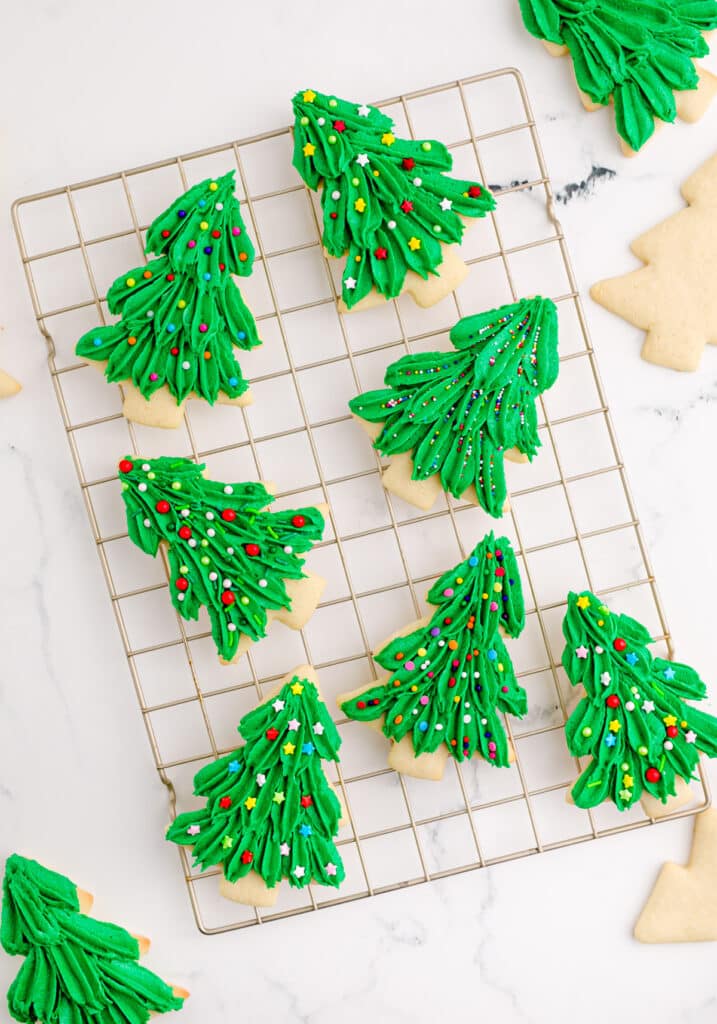
These cute Christmas Tree Cookies are the quintessential holiday snack full of sweetness and joy! These buttery sugar cookies are easy to make and so much fun to decorate using a simple green frosting and decorative sprinkles. Nothing screams Merry Christmas more than a bunch of these adorable and festive treats.

The Perfect Holiday Cookies
The Christmas season is always an exciting time of year for everyone. And I couldn’t be more eager to share my Christmas-inspired recipes that are always a big hit with my family. So, I am kicking it off with these seriously tasty Christmas tree cookies! Just seeing them brings on all the warm and joyful holiday feels! They make fantastic snacks to serve to guests, bring to potlucks, or make as thoughtful, handcrafted gifts to give to teachers, co-workers and loved ones.
Why This Recipe Works
- These Christmas tree sugar cookies are seriously so easy to make for something so pretty! I used a very simple sugar cookie and homemade frosting recipe. Chilling the dough takes time, but it’ll only take 10 minutes to bake.
- Involve the whole family in decorating the cookies and turn it into a fun bonding moment! Your kids will surely be enthusiastic about participating.
- Use another cookie cutter shape and different food coloring to make other Christmas-themed goodies like a snowman or gingerbread cookie.
Ingredients Needed
For the Sugar Cookies:
- Flour
- Salt
- Baking powder
- Salted butter
- Granulated sugar
- Eggs
- Vanilla
For the Green Buttercream Frosting:
- Salted butter
- Powdered sugar
- Milk
- Green coloring
- Vanilla

Kitchen Tools You’ll Need
- Whisk
- Medium bowl
- Electric mixer
- Rolling pin
- Cookie sheets
- Cooling racks
Time to Make Christmas Tree Cookies!
Preparations:
- Preheat the oven to 350 degrees.
- Spray your baking sheets or line them with parchment paper.
- Prepare a piping bag with star-shaped piping tip #98.
Steps:
Make the Sugar Cookies:
- Whisk the flour, salt, and baking powder in a medium mixing bowl.
- In a separate bowl, cream the butter and sugar using an electric hand mixer.
- Add the eggs, one at a time, and beat until light and creamy. Then mix in the vanilla extract.
- Add the dry ingredients to the wet ingredients and beat until thoroughly blended.
- Shape the cookie dough into a ball and place it in the fridge to chill for an hour.
- Remove from the fridge and allow the dough to rest at room temperature until it is soft enough to roll.
- Roll dough out onto a well-floured work surface about ¼ inch thick. Press the Christmas tree cookie cutter into the dough and cut out as many cookies as possible.
- Assemble the cookies 1 ½ inch apart on the prepared baking sheet. Bake for 7-10 minutes or until small cracks appears all over the tops of the cookies.
- Place the cookie sheets on cooling racks and allow them to cool for 5 minutes before removing the cookies. Then let the cookies cool completely on a wire rack before decorating.
Make the Frosting:
- To make the frosting, cream the butter and beat in the powdered sugar a little at a time. Then mix in the vanilla.
- Add milk to achieve the desired consistency and enough green food coloring to reach the desired color. Transfer to the prepared piping bag.
Assemble:
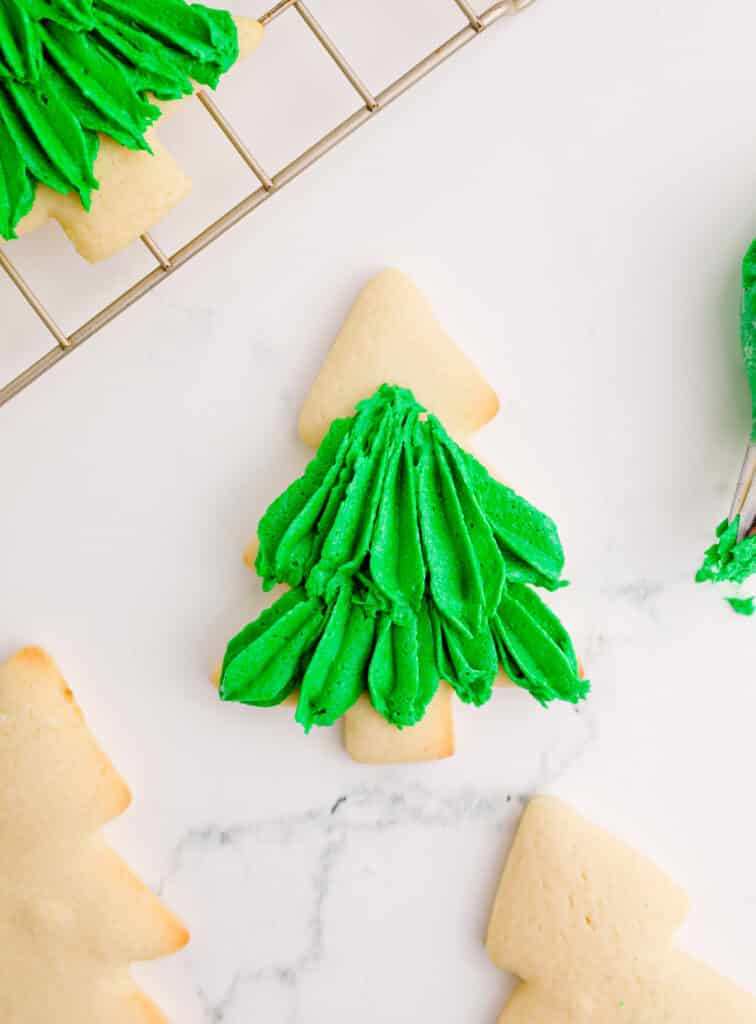
- Pipe the frosting starting at the base of the tree, then work your way up. Make sure to overlap the layers to make 3D tree branches.

Tips when Making Christmas Tree Cookies
- Follow the proper method in measuring your flour. Using too much will make the cookies dense and hard. Using a kitchen scale is the easiest way to do it. However, if you do not have one, simply scoop the flour using a spoon, transfer it to the measuring cup, and level the surface with the spoon handle. Do not press down!
- Use room temperature ingredients. Make sure to soften the butter but not melt it thoroughly to get the perfect cookie texture.
- Lightly flour your tree-shaped cookie cutter, so the dough does not stick. This will make it easier for you to have perfectly shaped cookies ready for baking.
- Observe the Christmas sugar cookies as they bake. Remove them from the oven once they are light golden brown. If you are making smaller or bigger cookie shapes, place them in a separate cookie sheet and pull them out earlier or later.
- The cookies will still be soft and pliable after baking, so let them rest and harden before carefully removing them from the pan.

Add-ons and Variations
- Add unsweetened cocoa powder to the flour mixture to make chocolate sugar cookies for variation.
- Unleash your creativity and make more frosting by mixing it with different food coloring like red and yellow.
- Aside from sprinkles, you can also use edible glitter, chocolate candies, mini m&ms, crushed nuts, and peppermint candy bits to decorate.

How to Store
Store these cookies at room temperature in an airtight container. Place wax paper between the layers so that they don’t stick together. If you are going to keep them for more than a week, place them in the fridge for up to 2 weeks, or they may be frozen for up to 6 months. If the cookies get too crispy for you, try adding a slice of bread, or a piece of apple to the airtight container. As the cookies absorb the moisture, they will soften up.
Frequently Asked Questions about Christmas Tree Cookies
You could sprinkle on colored sugar or sprinkles before baking. Or, if you have not decorated them before baking, you could brush the baked cookies very lightly with a mixture of equal parts corn syrup and water and then sprinkle on your decorations.
You’re right; this cookie recipe is not overly sweet. That is because the sweetness of the frosting creates a nice balance.
No, you want to take them out before they begin to turn brown. They will be a much nicer texture this way.
Yes, you could use a cylindrical water bottle, a wine bottle, or even a tall drinking glass.

INGREDIENTS
- 2 cups flour
- ¼ teaspoon salt
- 2 teaspoons baking powder
- ⅔ cup salted butter, softened
- ⅔ cup granulated sugar
- 2 medium eggs
- 1 teaspoon vanilla
FROSTING
- ⅔ cup salted butter, softened
- 4 cups powdered sugar
- 1 Tablespoon vanilla
- 3 teaspoons milk, more or less
- 20 drops green food coloring
INSTRUCTIONS
- Whisk together the flour, salt, and baking powder in a medium mixing bowl.
- In a separate bowl, cream the butter and sugar together using an electric mixer if you like.
- Add the eggs, one at a time, and beat well. Then mix in the vanilla.
- Add the dry ingredients (flour mixture) to the wet ingredients (butter mixture). Beat this until thoroughly blended.
- Shape the cookie dough into a ball and place it in the fridge to chill for an hour.
- When you are ready to bake the cookies, preheat the oven to 350 degrees. Allow the dough to rest at room temperature until it is soft enough to roll.
- Spray your baking sheets.
- Roll the dough out onto a well-floured surface. It should be about ¼ inch thick.
- Use a lightly floured tree-shaped cookie cutter to cut out as many cookies as possible.
- Place the cookies 1 ½ inches apart on the cookie sheets. Bake for 7-10 minutes or until small cracks appear all over the tops of the cookies. Watch them carefully and make sure to pull them out before the edges brown.
- Place the cookie sheets on cooling racks and allow them to cool for 5 minutes before removing the cookies. Then allow the cookies to cool completely on cooling racks before decorating.
- To make the frosting: cream the butter, beat in the powdered sugar a little at a time. Then mix in the vanilla. Only add enough milk to achieve the desired consistency and enough coloring to reach the desired color.
- Pipe the frosting onto the trees using star shaped piping tip #98 starting at the base of the tree, then work your way up. Make sure to overlap the layers so you get the tree branches look.


I love soft and chewy sugar cookies, and these are PERFECT. I also love the detailed instruction on how to pipe on the frosting. I’ve always struggled to try to figure out how to do that part… The other options for how to make them pretty are nice, too. Thank you so much for sharing such detailed instructions.
I can’t wait to make these with my boys. So cute
The cookies are delicious! So tasty, and sturdy enough to hold the decorations!